Placing Stickers
In the previous article, you learned how to create stickers for your album. To include these stickers in your printed album, you need to assign them a spot. This process, which we call placing, is explained in detail in this article.
How to Place a Sticker?
The process is simple: to place a sticker in your album, drag it with your mouse onto an album page. You can either drop it directly where you want it or assign it to an existing sticker area (more on that below).
Once you release the mouse, you’ll notice that the selected sticker disappears from the Not Placed section in the sidebar. It is now placed, assigned a number, and ready for printing.
Note: If you place a sticker on a page belonging to a different chapter, the sticker will automatically move to that chapter in the sidebar.
For example: Let’s say you have two chapters: Sales Team and Marketing Team. You create a sticker in the Sales Team chapter but drag it to a page belonging to the Marketing Team chapter. The sticker will be removed from the Sales Team section in the sidebar and moved to Marketing Team.
What Are Sticker Areas?
Your album template probably includes some sample pages with sticker areas. These areas suggest optimal spots for stickers on the page, ensuring a visually appealing layout — nothing more, nothing less!
To place a sticker in a sticker area, drag it from the sidebar onto the area as described above. If you don’t like the proposed layout of the sticker areas, you can move or delete them freely.
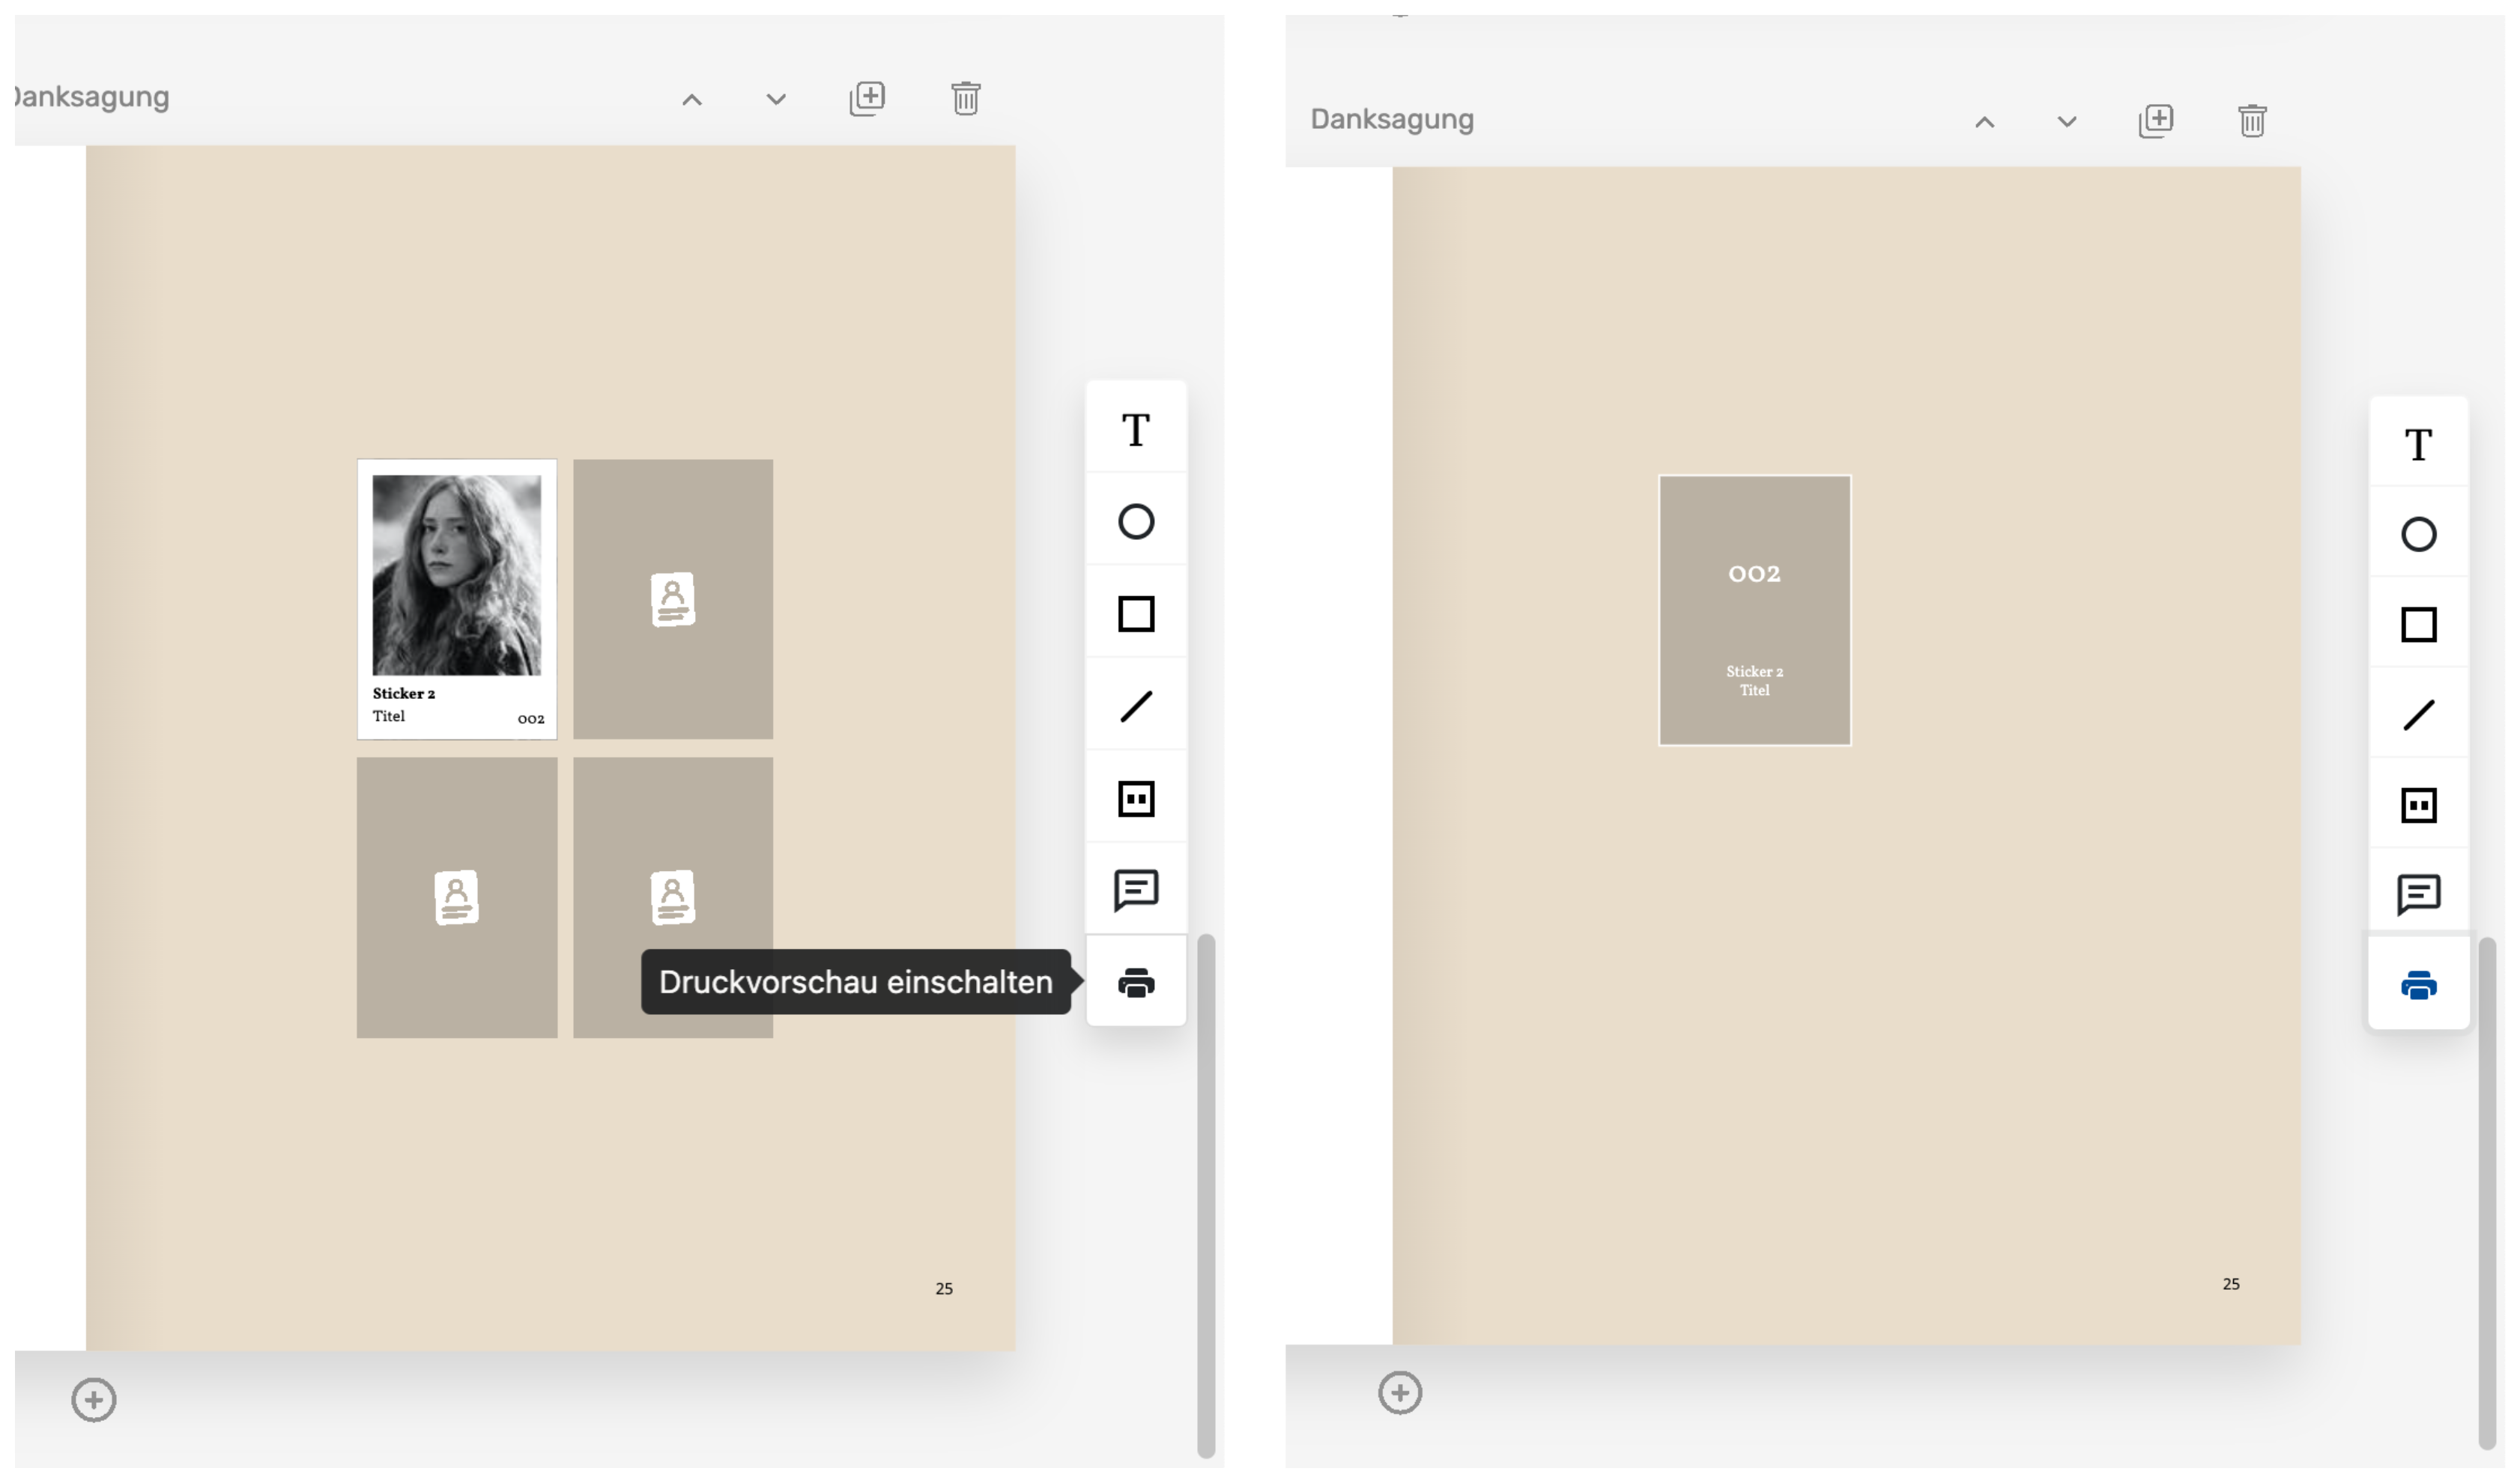
Empty sticker areas without stickers will not appear in the printed album. To preview how your album will look in print, you can enable Print Preview using the printer icon in the right-hand menu.
Sticker Display in the Album
As you may have guessed, the Designer defaults to showing a “fully stickered” view of your album — as it would appear when all stickers have been successfully collected and placed. The freshly printed version, however, only includes empty placeholders with the name and sticker number:

Replacing Stickers
It’s common to move a sticker to another page or even a different chapter. This is easy and can be done in a few ways: either detach the sticker or drag it directly to a new page.
-
Detaching a Sticker: This will unplace the sticker, sending it back to the Not Placed section in the sidebar of its chapter, ready for re-placement.
To detach a sticker, select it in the album and click the Detach Sticker button. -
Moving Directly: Drag the sticker from its current location to the desired page or chapter.
By using these methods, you can organize and reorganize your stickers until your album is exactly as you envision it.