Creating Stickers
In this article, you’ll learn about the options for creating stickers for your album. If you’re looking for information about the Stickerlink, which allows others to upload stickers for your album, please click here.
What is a Sticker?
Stickers are 5x7 cm rectangular labels that will later be delivered to you in sticker packs. They add a special charm to your album by encouraging interaction among your guests or colleagues and sparking a collecting frenzy! Each sticker has a specific spot in the album, determined by its sticker number.
What you choose to feature on your stickers is entirely up to you. Based on experience, albums work best when they showcase your sticker stars with a portrait photo, their name, and possibly their role.
- Weddings
- Birthdays
- Corporate Events
Additional motifs, such as photos of shared memories and experiences, are great options.
Alongside your guests, you might want to feature your life journey (including funny childhood photos)!
Popular and proven motifs include images of colleagues, the company’s history, past (team) events, products, or accomplishments.
Single and Double Stickers
We distinguish between single and double stickers:
- Single stickers are primarily for individuals and portrait photos.
- Double stickers are ideal for wider motifs (e.g., group photos) and are spread across two stickers side by side.
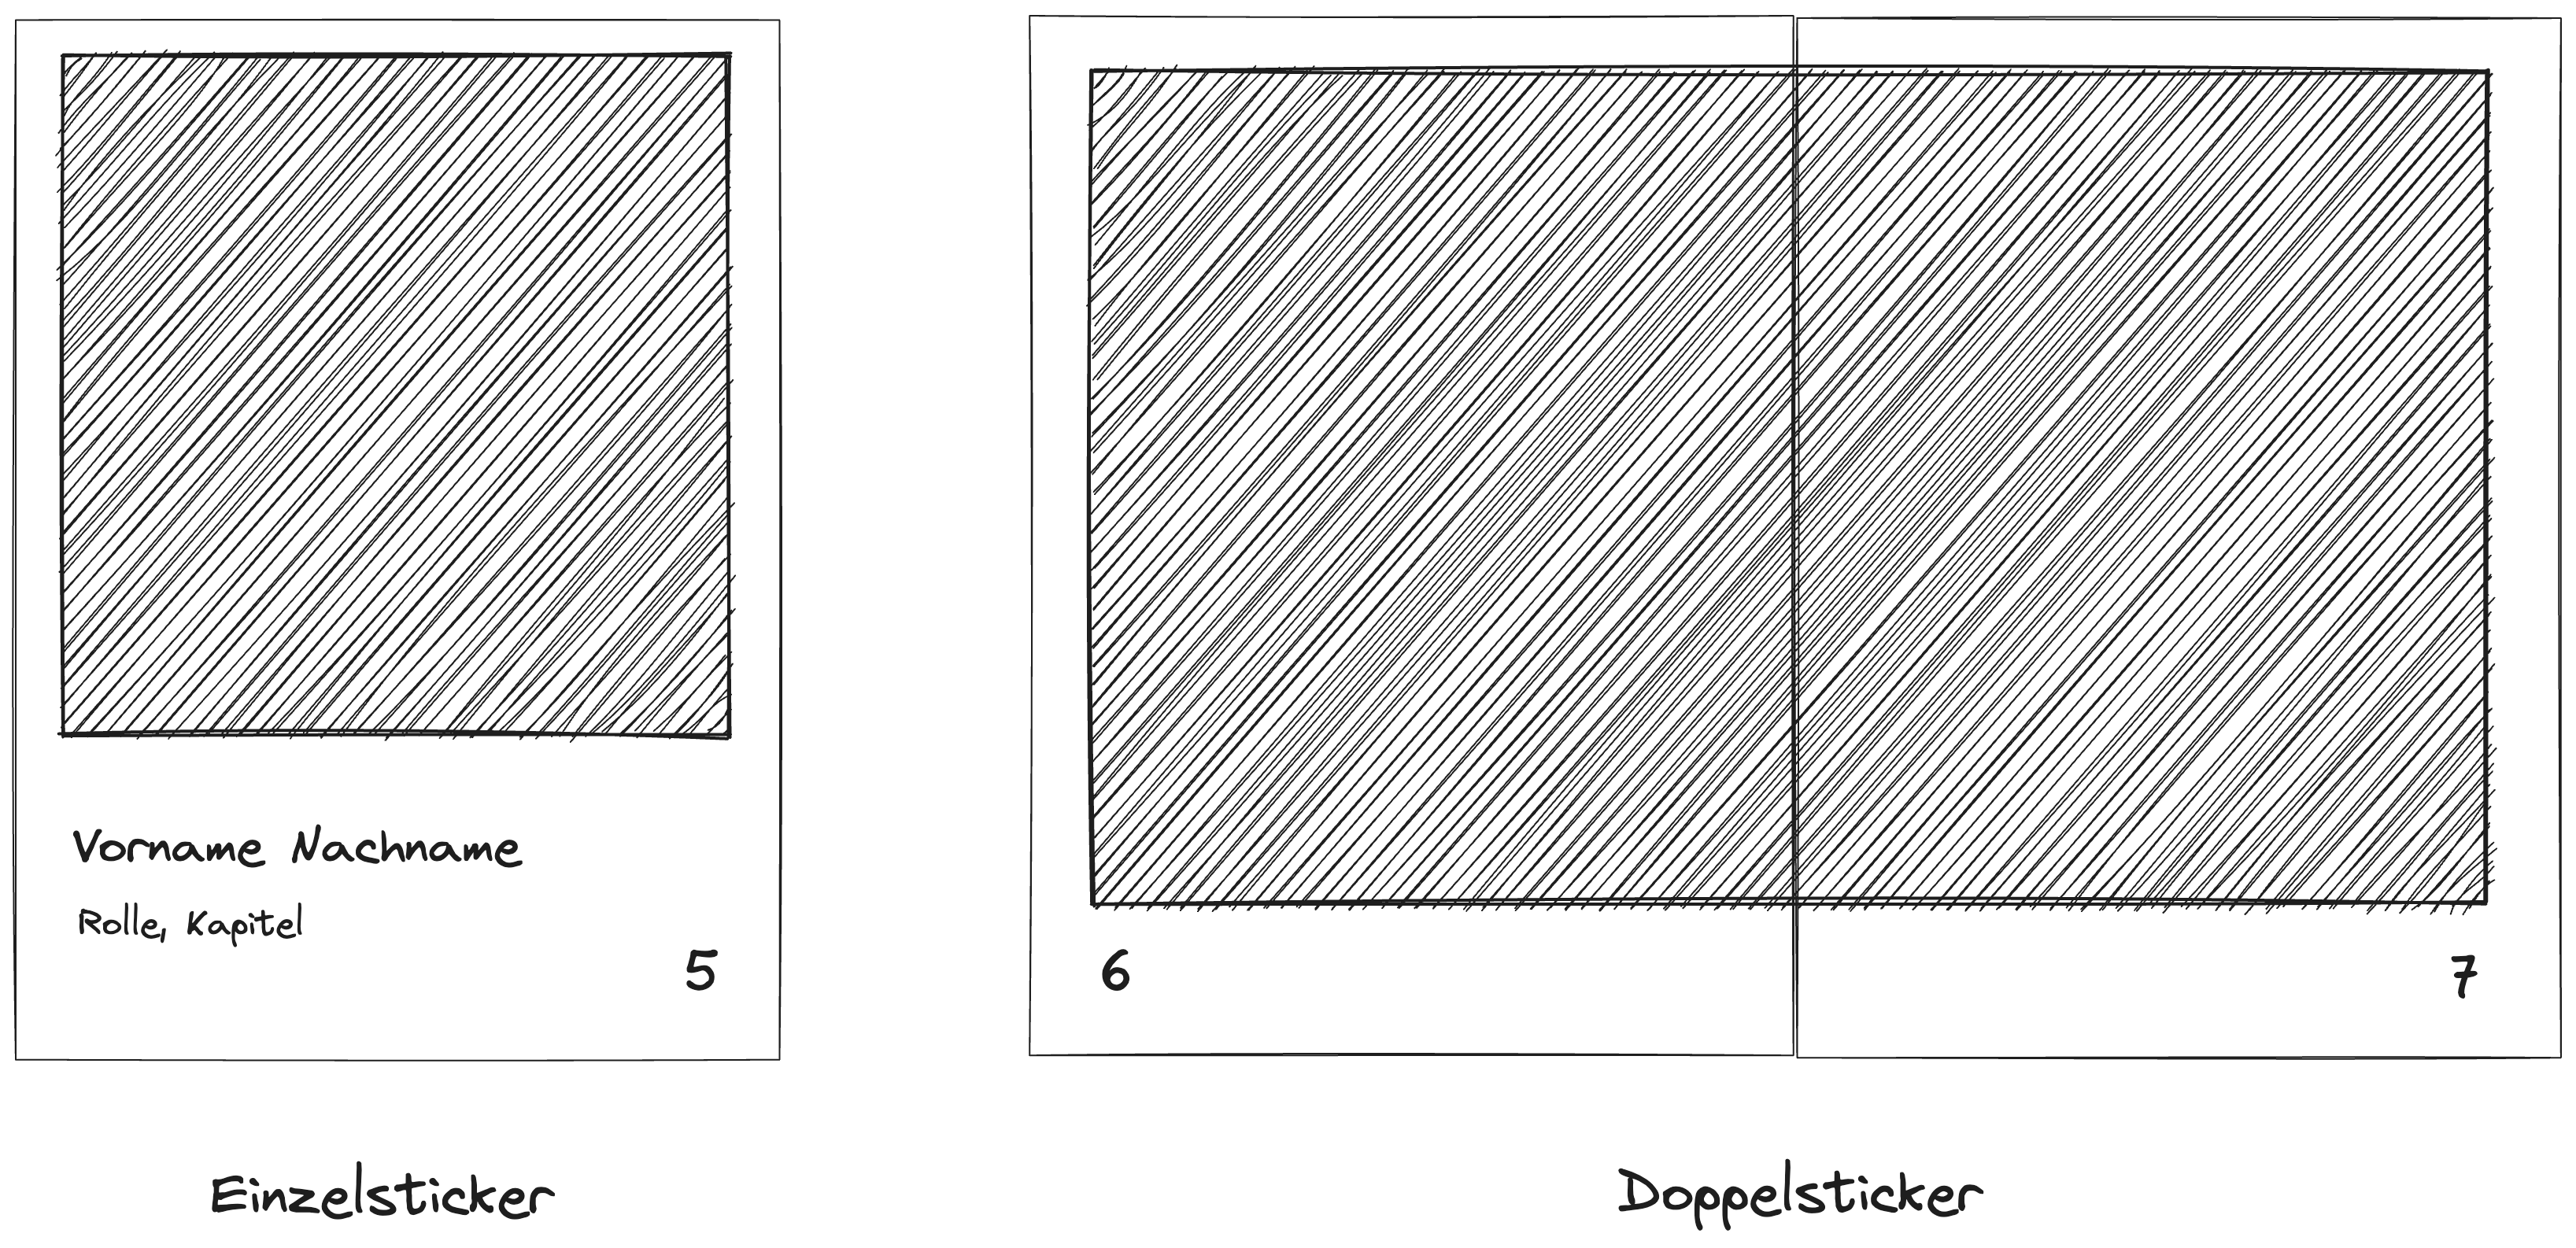
A single sticker includes the image, the person’s name, an optional short description, and the sticker number. Double stickers consist of two stickers displaying a single cohesive image but do not include text.
Creating and Editing Stickers
Using the Upload Button
Click the upload button in the sticker tab on the sidebar to open a file dialog. You can select and upload up to 20 image files from your computer simultaneously. Once the upload begins, a progress indicator will appear within the button.
Each selected file creates a sticker. The designer attempts to interpret file names to name the stickers appropriately. Don’t worry; you can always adjust these names. Newly created stickers are placed in the topmost chapter by default.
Drag-and-Drop
Alternatively, drag files directly from your computer and drop them onto a chapter in the sidebar.
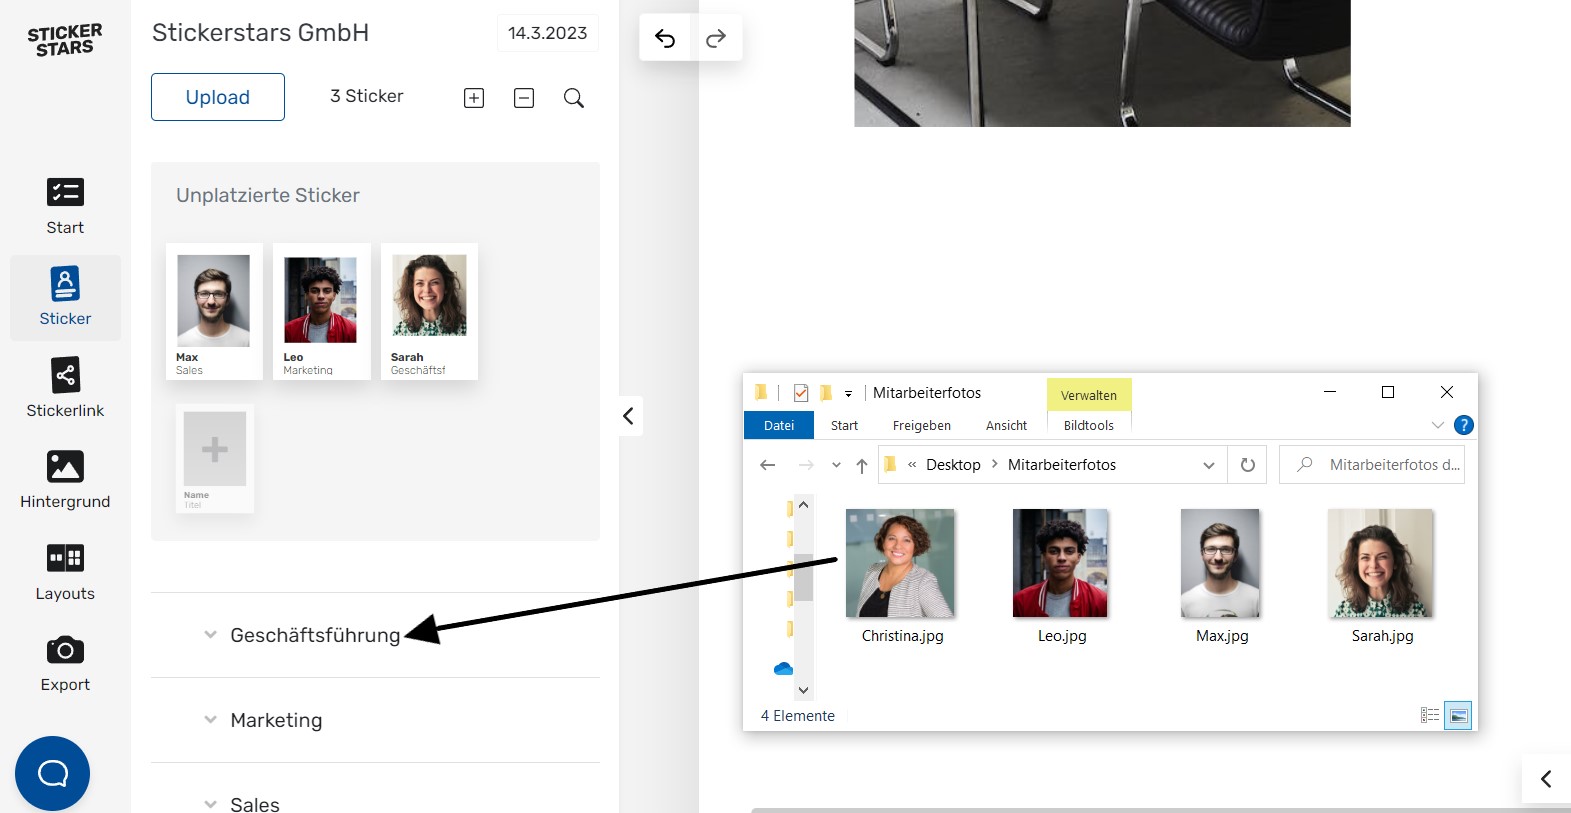
In the example image, we drag and drop a file—Christina.jpg—from our computer into the top chapter of the album, Management Team. Once released, the Designer starts uploading and creating the sticker.
Sticker Templates
You can also customize your stickers' appearance on two levels:
- Sticker Design: Defines the overall style for all stickers in your album. This design is chosen during album creation but can be updated anytime.
- Sticker Layout: Allows specific design options for individual stickers within the chosen sticker design, such as "frameless" or text-free layouts.
Choosing Sticker Design
Select your preferred sticker design in the Design menu. You can experiment with various designs until you find your favorite. Once chosen, the design is applied to all stickers for a consistent look. Changes made later in the Design menu will update all stickers without losing individual adjustments.
Selecting Sticker Layouts
For individual sticker layouts, click on a specific sticker to open the layout menu. Here, you can select layout options matching the chosen design, such as adding/removing frames or text. These options allow unique touches to your stickers while maintaining the album's overall aesthetic.